
One of the most commonly discussed terms today is the API. A lot of people don’t know exactly what an API is. Basically, API stands for Application Programming Interface. It is, as the name says, an interface with which people — developers, users, consumers — can interact with data.
You can think of an API as a bartender. You ask the bartender for a drink, and they give you what you wanted. Simple. So why is that a problem?
Since the start of the modern web, building APIs has not been as hard as it sounds. But learning and understanding APIs was. Developers form the majority of the people that will use your API to build something or just consume data. So your API should be as clean and as intuitive as possible. A well-designed API is very easy to use and learn. It’s also intuitive, a good point to keep in mind when you’re starting to design your API.
We’ve been using REST to build APIs for a long time. Along with that comes some problems. When building an API using REST design, you’ll face some problems like:
1) you’ll have a lot of endpoints
2) it’ll be much harder for developers to learn and understand your API
3) there is over- and under-fetching of information
To solve these problems, Facebook created GraphQL. Today, I think GraphQL is the best way to build APIs. This article will tell you why you should start to learn it today.
In this article, you’re going to learn how GraphQL works. I’m going to show you how to create a very well-designed, efficient, powerful API using GraphQL.
You’ve probably already heard about GraphQL, as a lot of people and companies are using it. Since GraphQL is open-source, its community has grown huge.
Now, it’s time for you start to learn in practice how GraphQL works and all about its magic.
What is GraphQL?
GraphQL is an open-source query language developed by Facebook. It provides us with a more efficient way design, create, and consume our APIs. Basically, it’s the replacement for REST.
GraphQL has a lot of features, like:
Getting started
The main objective in this article is not to learn how to set up a GraphQL server, so we’re not getting deep into that for now. The objective is to learn how GraphQL works in practice, so we’re gonna use a zero-configuration GraphQL server called ☄️ Graphpack.
To start our project, we’re going to create a new folder and you can name it whatever you want. I’m going to name it graphql-server:
Open your terminal and type:
mkdir graphql-server
Now, you should have npm or yarn installed in your machine. If you don’t know what these are, npm and yarn are package managers for the JavaScript programming language. For Node.js, the default package manager is npm.
Inside your created folder type the following command:
npm init -y
Or if you use yarn:
yarn init
npm will create a package.json file for you, and all the dependencies that you installed and your commands will be there.
So now, we’re going to install the only dependency that we’re going to use.
☄️Graphpack lets you create a GraphQL server with zero configuration. Since we’re just starting with GraphQL, this will help us a lot to go on and learn more without getting worried about a server configuration.
In your terminal, inside your root folder, install it like this:
npm install --save-dev graphpack
Or, if you use yarn, you should go like this:
yarn add --dev graphpack
After Graphpack is installed, go to our scripts in package.json file, and put the following code there:
We’re going to create a folder called src, and it’s going to be the only folder in our entire server.
Create a folder called src, after that, inside our folder, we’re going to create three files only.
Inside our src folder create a file called schema.graphql. Inside this first file, put the following code:
In this schema.graphql file is going to be our entire GraphQL schema. If you don’t know what it is, I’ll explain later — don't worry.
Now, inside our src folder, create a second file. Call it resolvers.js and, inside this second file, put the following code:
This resolvers.js file is going to be the way we provide the instructions for turning a GraphQL operation into data.
And finally, inside your src folder, create a third file. Call this db.js and, inside this third file, put the following code:
In this tutorial we’re not using a real-world database. So this db.js file is going to simulate a database, just for learning purposes.
Now our src folder should look like this:
src
|--db.js
|--resolvers.js
|--schema.graphql
Now, if you run the command npm run dev or, if you’re using yarn, yarn dev, you should see this output in your terminal:
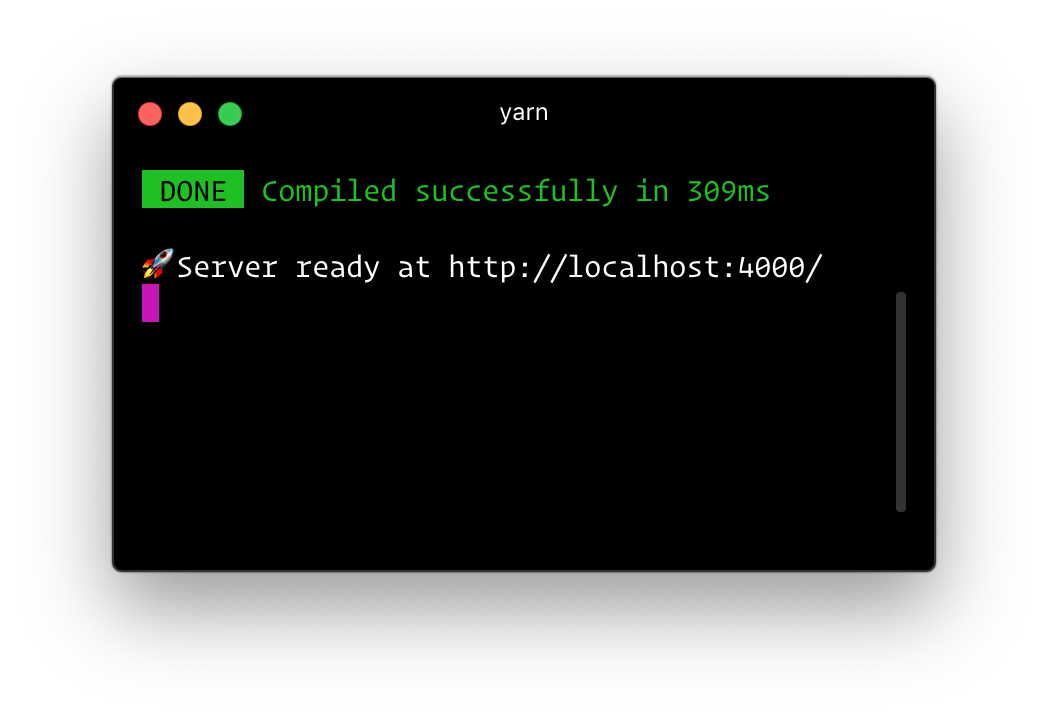
You can now go to localhost:4000 . This means that we’re ready to go and start writing our first queries, mutations, and subscriptions in GraphQL.
You see the GraphQL Playground, a powerful GraphQL IDE for better development workflows. If you want to learn more about GraphQL Playground, click here.
Schema
GraphQL has its own type of language that’s used to write schemas. This is a human-readable schema syntax called Schema Definition Language (SDL). The SDL will be the same, no matter what technology you’re using — you can use this with any language or framework that you want.
This schema language its very helpful because it’s simple to understand what types your API is going to have. You can understand it just by looking right it.
Types
Types are one of the most important features of GraphQL. Types are custom objects that represent how your API is going to look. For example, if you’re building a social media application, your API should have types such as Posts, Users, Likes, Groups.
Types have fields, and these fields return a specific type of data. For example, we’re going to create a User type, we should have some name, email, and agefields. Type fields can be anything, and always return a type of data as Int, Float, String, Boolean, ID, a List of Object Types, or Custom Objects Types.
So now to write our first Type, go to your schema.graphql file and replace the type Query that is already there with the following:
Each User is going to have an ID, so we gave it an ID type. User is also going to have a name and email, so we gave it a String type, and an age, which we gave an Int type. Pretty simple, right?
But, what about those ! at the end of every line? The exclamation point means that the fields are non-nullable, which means that every field must return some data in each query. The only nullable field that we’re going to have in our User type will be age.
In GraphQL, you will deal with three main concepts:
Queries
To explain this in a simple way, queries in GraphQL are how you’re going to get data. One of the most beautiful things about queries in GraphQL is that you are just going to get the exact data that you want. No more, no less. This has a huge positive impact in our API — no more over-fetching or under-fetching information as we had with REST APIs.
We’re going to create our first type Query in GraphQL. All our queries will end up inside this type. So to start, we’ll go to our schema.graphql and write a new type called Query:
It’s very simple: the users query will return to us an array of one or more Users. It will not return null, because we put in the ! , which means it’s a non-nullable query. It should always return something.
But we could also return a specific user. For that we’re going to create a new query called user. Inside our Query type, put the following code:
You can think of an API as a bartender. You ask the bartender for a drink, and they give you what you wanted. Simple. So why is that a problem?
Since the start of the modern web, building APIs has not been as hard as it sounds. But learning and understanding APIs was. Developers form the majority of the people that will use your API to build something or just consume data. So your API should be as clean and as intuitive as possible. A well-designed API is very easy to use and learn. It’s also intuitive, a good point to keep in mind when you’re starting to design your API.
We’ve been using REST to build APIs for a long time. Along with that comes some problems. When building an API using REST design, you’ll face some problems like:
1) you’ll have a lot of endpoints
2) it’ll be much harder for developers to learn and understand your API
3) there is over- and under-fetching of information
To solve these problems, Facebook created GraphQL. Today, I think GraphQL is the best way to build APIs. This article will tell you why you should start to learn it today.
In this article, you’re going to learn how GraphQL works. I’m going to show you how to create a very well-designed, efficient, powerful API using GraphQL.
You’ve probably already heard about GraphQL, as a lot of people and companies are using it. Since GraphQL is open-source, its community has grown huge.
Now, it’s time for you start to learn in practice how GraphQL works and all about its magic.
What is GraphQL?
GraphQL is an open-source query language developed by Facebook. It provides us with a more efficient way design, create, and consume our APIs. Basically, it’s the replacement for REST.
GraphQL has a lot of features, like:
- You write the data that you want, and you get exactly the data that you want. No more over-fetching of information as we are used to with REST.
- It gives us a single endpoint, no more version 2 or version 3 for the same API.
- GraphQL is strongly-typed, and with that you can validate a query within the GraphQL type system before execution. It helps us build more powerful APIs.
Getting started
The main objective in this article is not to learn how to set up a GraphQL server, so we’re not getting deep into that for now. The objective is to learn how GraphQL works in practice, so we’re gonna use a zero-configuration GraphQL server called ☄️ Graphpack.
To start our project, we’re going to create a new folder and you can name it whatever you want. I’m going to name it graphql-server:
Open your terminal and type:
mkdir graphql-server
Now, you should have npm or yarn installed in your machine. If you don’t know what these are, npm and yarn are package managers for the JavaScript programming language. For Node.js, the default package manager is npm.
Inside your created folder type the following command:
npm init -y
Or if you use yarn:
yarn init
npm will create a package.json file for you, and all the dependencies that you installed and your commands will be there.
So now, we’re going to install the only dependency that we’re going to use.
☄️Graphpack lets you create a GraphQL server with zero configuration. Since we’re just starting with GraphQL, this will help us a lot to go on and learn more without getting worried about a server configuration.
In your terminal, inside your root folder, install it like this:
npm install --save-dev graphpack
Or, if you use yarn, you should go like this:
yarn add --dev graphpack
After Graphpack is installed, go to our scripts in package.json file, and put the following code there:
We’re going to create a folder called src, and it’s going to be the only folder in our entire server.
Create a folder called src, after that, inside our folder, we’re going to create three files only.
Inside our src folder create a file called schema.graphql. Inside this first file, put the following code:
In this schema.graphql file is going to be our entire GraphQL schema. If you don’t know what it is, I’ll explain later — don't worry.
Now, inside our src folder, create a second file. Call it resolvers.js and, inside this second file, put the following code:
This resolvers.js file is going to be the way we provide the instructions for turning a GraphQL operation into data.
And finally, inside your src folder, create a third file. Call this db.js and, inside this third file, put the following code:
In this tutorial we’re not using a real-world database. So this db.js file is going to simulate a database, just for learning purposes.
Now our src folder should look like this:
src
|--db.js
|--resolvers.js
|--schema.graphql
Now, if you run the command npm run dev or, if you’re using yarn, yarn dev, you should see this output in your terminal:
You can now go to localhost:4000 . This means that we’re ready to go and start writing our first queries, mutations, and subscriptions in GraphQL.
You see the GraphQL Playground, a powerful GraphQL IDE for better development workflows. If you want to learn more about GraphQL Playground, click here.
Schema
GraphQL has its own type of language that’s used to write schemas. This is a human-readable schema syntax called Schema Definition Language (SDL). The SDL will be the same, no matter what technology you’re using — you can use this with any language or framework that you want.
This schema language its very helpful because it’s simple to understand what types your API is going to have. You can understand it just by looking right it.
Types
Types are one of the most important features of GraphQL. Types are custom objects that represent how your API is going to look. For example, if you’re building a social media application, your API should have types such as Posts, Users, Likes, Groups.
Types have fields, and these fields return a specific type of data. For example, we’re going to create a User type, we should have some name, email, and agefields. Type fields can be anything, and always return a type of data as Int, Float, String, Boolean, ID, a List of Object Types, or Custom Objects Types.
So now to write our first Type, go to your schema.graphql file and replace the type Query that is already there with the following:
Each User is going to have an ID, so we gave it an ID type. User is also going to have a name and email, so we gave it a String type, and an age, which we gave an Int type. Pretty simple, right?
But, what about those ! at the end of every line? The exclamation point means that the fields are non-nullable, which means that every field must return some data in each query. The only nullable field that we’re going to have in our User type will be age.
In GraphQL, you will deal with three main concepts:
- queries — the way you’re going to get data from the server.
- mutations — the way you’re going to modify data on the server and get updated data back (create, update, delete).
- subscriptions — the way you’re going to maintain a real-time connection with the server.
Queries
To explain this in a simple way, queries in GraphQL are how you’re going to get data. One of the most beautiful things about queries in GraphQL is that you are just going to get the exact data that you want. No more, no less. This has a huge positive impact in our API — no more over-fetching or under-fetching information as we had with REST APIs.
We’re going to create our first type Query in GraphQL. All our queries will end up inside this type. So to start, we’ll go to our schema.graphql and write a new type called Query:
It’s very simple: the users query will return to us an array of one or more Users. It will not return null, because we put in the ! , which means it’s a non-nullable query. It should always return something.
But we could also return a specific user. For that we’re going to create a new query called user. Inside our Query type, put the following code: